UML-B Tutorial
The tutorial assumes you have downloaded and installed the Rodin platform and then installed the UML-B plug-in extension feature.
See http://www.event-b.org/platform.html and http://www.event-b.org/plugins.html for installation instructions
Getting Started
1. Start Rodin by clicking on rodin.exe
2. The workspace launcher will appear - Select or create a workspace on your machine
3. Close the welcome message
4. Open the UML-B perspective
       a.	Click on: Window → Open Perspective → Other…
       b.	Select UML-B and click OK
5. Open a new UMLB project
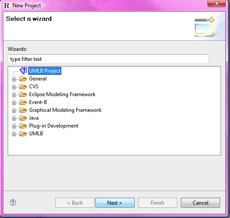
       a.	File → New → Project
       b.	Select UML-B Project → Next
       c.	Enter a name for your project and click Finish
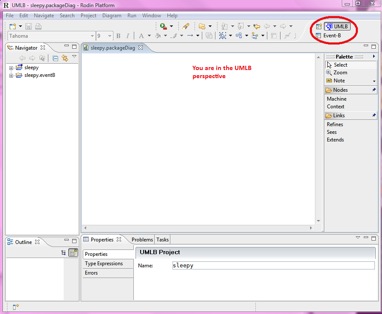
       d.	The UML-B new project wizard, automatically creates and opens a package diagram ready for you to start modelling
Note that the icon, top right, shows that you are in the UML-B perspective
Creating the Sleepy model
Specification: A person can go to bed and sleep. After at least one hour, an alarm can be sounded which is waking the person. The person should then get up. A person has a maximum number of hours of sleep after which the person will get up without the alarm being sounded.
Package Diagram
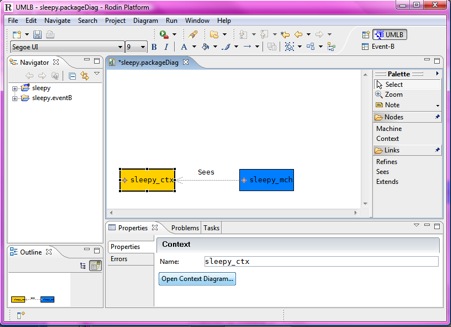
In the package diagram editor, create a machine that sees a context.
       a.	Create a machine: click on “machine” in the palette and click in the package diagram space, then name your machine.
               (You can enter the name on the text field of the diagram element. Alternatively you can edit any element properties in the Properties tab).
       b.	Create a context: click on “context” in the palette and click in the package diagram space, then name your context
       c.	Click on “Sees” in the palette and create a link from your machine to the context
       d.	Click save
WARNING: Make sure you always save an edited diagram before moving to another diagram in the same UML-B project. There is currently a problem with multiple diagram editors: unsaved changes in the first editor will be lost if you save edits to a second diagram.
Context Diagram
Open the context diagram
       a.	Highlight  the context diagram box in your package diagram
       b.	In the properties tab click on “open context diagram…”
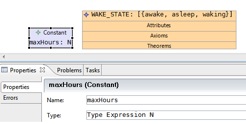
Create an enumerated type. We need three states: awake, asleep and waking. These are elements of an enumerated set WAKE_STATE.
       a.	Click on “class type” in the palette and click into the context diagram space
       b.	In the properties tab, type a name “WAKE_STATE” for your class type → press enter
              (DO NOT enter the name of the class type in the diagram, use the properties tab to enter all data)
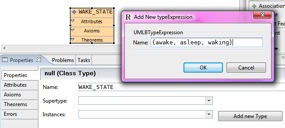
       c.	In the properties tab, click “add new type” in order to define the enumerated set
       d.	Type “{awake, asleep, waking}” into the Name field of the type expression dialog → OK
       e.	In the properties tab, select the type {awake, asleep, waking} from the “instances” drop-down menu
Create a constant which holds the maximum number of hours a person may sleep.
       a.	Select “constant” from the palette and click into the context diagram space
       b.	In the properties tab, type a name “maxHours” for your constant and give it the type “N” (where “N” = NAT is the symbol representing natural numbers).
       c.	Save the context diagram
Create/Open a Class Diagram for the machine
The class diagram models the dynamic behaviour of the system.
       a.	Open the package diagram (either select the tab, or find it in the navigator)
       b.	Highlight the machine in the package diagram
       c.	In the properties tab, click “open class diagram…”
The model only requires one class in the class diagram. This class, person, will require two variables, “hoursOfSleep”, which tracks the amount of hours a person has slept, and “wakeState”, which records the current state of that person. The model also needs several events to manipulate the state. These are; “goToBed” (to set the wakeState of a person to asleep), “addMoreSleep” (to add another hour of sleep to the person’s hoursOfSleep count), “soundAlarm” (to wake up a person and set the wakeState of that person to waking) and “getUp” (to set the person’s wakeState to awake).
Create a class.
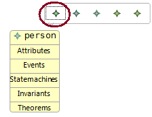
       a.	Select “class” in the palette and click into the class diagram space
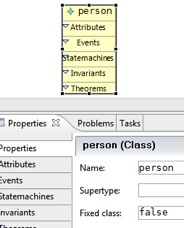
       b.	In the properties tab, enter a name for your class “person”
c. Move your mouse over the class in the class diagram, and select “add attribute” from the menu that pops up. (You could also use the tool palette).
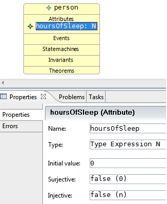
d. In the properties tab, enter the name “hoursOfSleep”, the type “N” and the initial value “0” of your attribute.
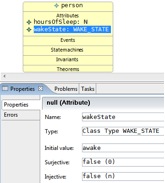
e. Add another attribute to the class, and name it “wakeState”, type “Class Type WAKE_STATE” (this will use the enumerated set you created in the context diagram) and initial value “awake”.
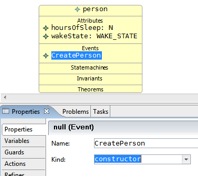
Add a constructor event to the class, (this will add and initialise instances of the class).
       a.	Add an event to the class “person” (either use the pop-up menu or the palette).
       b.	In the properties tab, enter a name for the person “CreatePerson”
       c.     Select “constructor” in the “kind” drop-down menu.
Add an event to the class.
       a.	Add another event to the class person
       b.	Enter the name “goToBed” in the properties tab
       c.	Select “guards” in the properties tab and “add guard…”
       d.	In the guard field enter “wakeState(self) = awake” (we only want to put persons into bed that are awake) → OK.
Note that you could also enter “self,.wakeState = awake” (the character pair ,. is converted to a special dot symbol). This gives a more object oriented style for guards and actions.
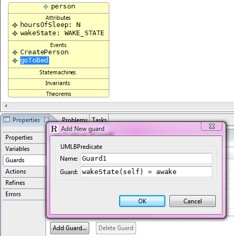
       e.	Select “actions” in the properties tab and “add action…”
       f.	In the action field enter “wakeState(self) := asleep”  → OK
       g.	Add another action and enter: “hoursOfSleep(self) := 0”
       h.	Save your class diagram
Add the next three events to complete the model.
The event “addMoreSleep” adds another hour of sleep to the person’s sleep count. The person may, however, not sleep more than the maximum hours of sleep allowed.
       a.	Add another event to class person
       b.	In the properties tab, enter the name “addMoreSleep” → press enter
       c.	Add two guards: “wakeState(self) = asleep” and “hoursOfSleep(self) < maxHours”
       d.	Add one action: “hoursOfSleep(self) := hoursOfSleep(self) + 1”
The event “soundAlarm” is used to wake up a person who has slept for at least one hour, and has not slept the maximum amount of hours.
       a.	Add another event to class person
       b.	Enter name: “soundAlarm”
       c.	Add guards: “wakeState(self) = asleep”, “hoursOfSleep(self) > 0” and “hoursOfSleep(self) < maxHours”
       d.	Add action: “wakeState(self) := waking”
The event “getUp”, will set the person’s wakeState to awake. It should be enabled when the person was woken by the alarm, i.e. is in a waking state or if the maximum hours of sleep have been reached.
       a.	Add another event to class person
       b.	Enter name: “getup”
       c.	Add guard: (wakeState(self) = waking) or (wakeState(self) = asleep & hoursOfSleep(self) ≥ maxHours)
       d.    Add actions: "wakeState(self) := awake"  and  "hoursOfSleep(self) :=0"
       e.	Save the class diagram.
An alternative way to model this same specification using statemachines is given below.
View the generated Event-B
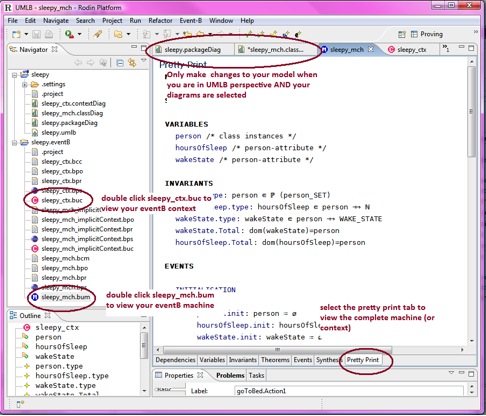
To view the generated Event-B context and machine, open the xxx.eventB folder (where xxx stands for the name of your project). You will see a long list of files. (You could switch to the Event-B perspective, which will filter the files in the Navigator to show the ones you can open). In order to view your context, double click on xxx.buc; for the machine click on xxx.bum. You will see several tabs at the bottom, select “Pretty Print” to view the generated eventB.
If you want to experiment with the Event-B tools, you can edit the Event-B model in this view. However, any changes you make will not be fed back to the UML-B source models, so if you alter the UML-B model your Event-B edits will be overwritten and lost.
Creating the Sleepy Model using Statemachines
Statemachines provide an alternative way to model behaviour. This section shows how a statemachine could be used to replace some of the data, state variables and events of the previous model. If you use a different UML-B project name you can compare the generated Event-B from the two models.
Context Diagram.
The context of this model does not contain the enumerated set WAKE_STATE, because those states are generated by UML-B automatically from the statemachine.
The context consists of only one constant maxHours.
a. In the context diagram, create one constant (name: maxHours; type: N)
Class Diagram
The class diagram consists of one class, “person”, which has one attribute “hoursOfSleep” to track the amount of hours a person has slept.
Add a class, 'person' with attribute, 'hoursOfSleep'
       a.	In the class diagram, create a class (name: person)
       b.	Add an attribute to the class (name: hoursOfSleep; type: N; initial value: 0)
This time, the events will be created using a statemachine.
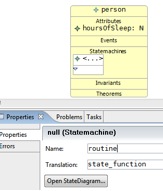
Add a class statemachine
       a.	Select C Statemachine from the palette and click in the 'statemachines' compartment of class “person”
       b.    Name the statemachine, "wakeState"
Note: Two alternative translations of statemachines are provided. To change to the other translation, change the 'Translation' property in the properties view.
c. Click “Open StateDiagram…”
Add states to the statemachine
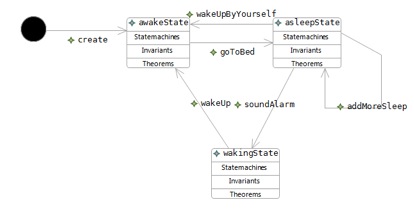
       a.	From the palette select state and create a state (name: awakeState)
       b.	Do the same for the other two states: asleepState, wakingState
       c.	Create an initial state (it doesn't need a name).
Add transitions between states.
State transitions represents events
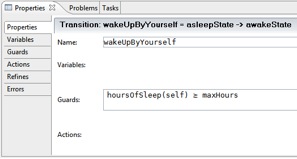
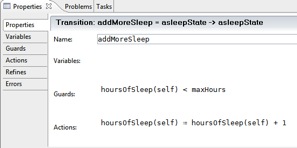
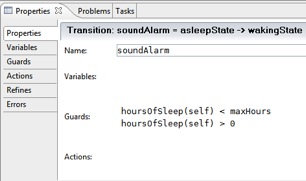
a. Create transitions to match the diagram below
b. Add the following detail to the different transitions.
c. Save the model and view the Event-B as before.
Note: Two alternative translations of statemachines are provided. To change to the other translation, select the statemachine (either click on the canvas of the statemachine diagram or click on the statemachine in the class diagram) and change the 'Translation' property in the properties view.
