Extending the Rodin database (How to extend Rodin Tutorial)
In this part
We will explain how to add a new attribute to events elements and add a new element in the database. Here are the steps we will detail :
- add dependencies to the plugins providing the extension services and interfaces we want to use,
- add the extensions point we will use, and define our extensions,
For more information about the database extension, please refer to : Extending the Rodin Database
Step 1
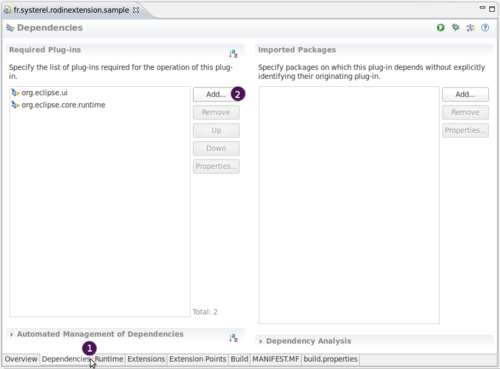
When one wants to use extension points provided by a plugin, one has to add a dependency to this plugin. We will use 2 extension points to extend the database, so we need to add a dependency to the plugin org.rodinp.core which defines them. Moreover, as we want to manipulate event-b elements, we will manipulate interfaces and public classes provided by the event-B plugin. We will then add a dependency to the plugin org.eventb.core To do this, open the MANIFEST.MF file in the forlder META-INF of our plugin to get the following:
1. Click on the "Dependencies" Tab,
2. Click on the Add button.
A dialog appears, start to enter org.rodinp.core and select this plugin, press "OK" to add it to the dependencies.
The dependency to org.rodinp.core has been added.
Re-do the above operations to add org.eventb.core.
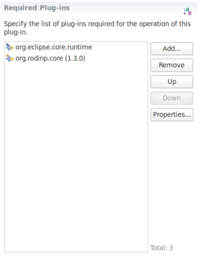
You should now have the following dependencies added to the plugin :
Step 2
We will add now the Extensions Points that we want to use, and define extensions using them.
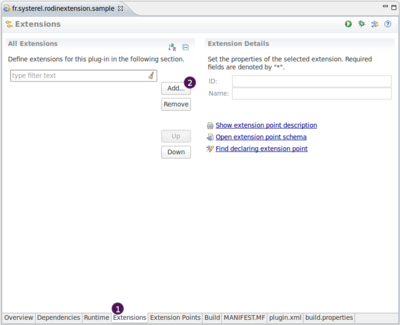
1. Click on the "Extensions" Tab,
2. and click on the "Add" button.
As we will start by extending the database by adding the attribute "probabilistic", we will create an extension for org.rodinp.core.attributeTypes extension point. Hence, we need to add this extension point first before creating an extension with it.
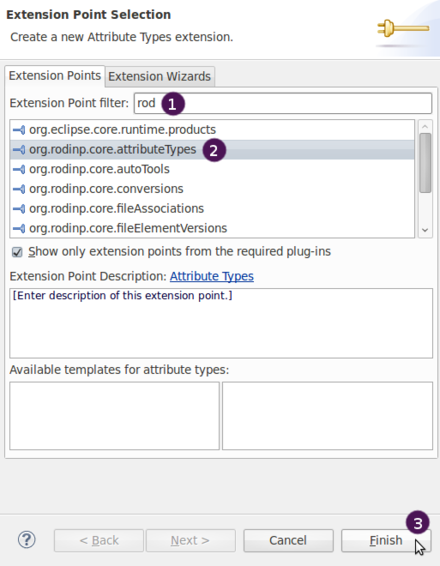
To do so... on the wizard that appeared (see picture above):
1. start to type the extension point name org.rodinp.core.attributeTypes, to reveal it in the list of available extension points,
2. select it in the list, and click on "Finish" to add it.
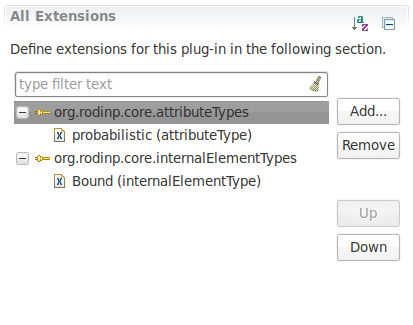
The extension point org.rodinp.core.attributeTypes now appears in the list on the "Extensions" page of the MANIFEST.MF of our plugin.
Step 3
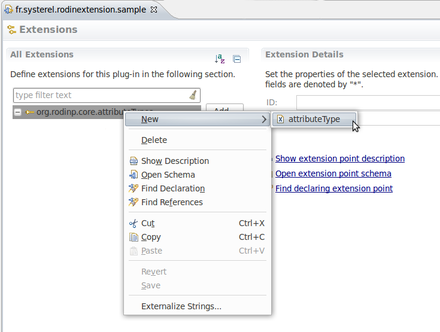
We will now add the attribute "probabilistic" in the database, creating an extension for org.rodinp.core.attributeTypes. Right click on the extension point, select New > attributeType as in the picture below :
A new extension attributeType has been added. We will edit it to add our "probabilistic" attribute.
As an event can be probabilistic or not, we set the kind of this attribute to boolean.
Give a unique ID to this attribute (here fr.systerel.rodinextension.sample.probabilistic) and a name (here probabilistic).
You should now have something similar to what appears in the picture below :
Step 4
We will now add a new element "Bound" to set the upper bound of the probabilistic variant.
Repeat the step 2, to add the extension point : org.rodinp.core.internalElementTypes.
Create an extension to specify our new element "Bound" using the right click as previously.
You shall now specify the details for this new extension element :
As in the picture above :
1. give the element a unique ID (here fr.systerel.rodinextension.sample.bound)
2. give a name to this element (here Bound)
3. now things differ, as this extension point (org.rodinp.core.internalElementTypes) requires us to provide a class describing the element.
Click on the "class*:" link to open a wizard that will help us to create this class.
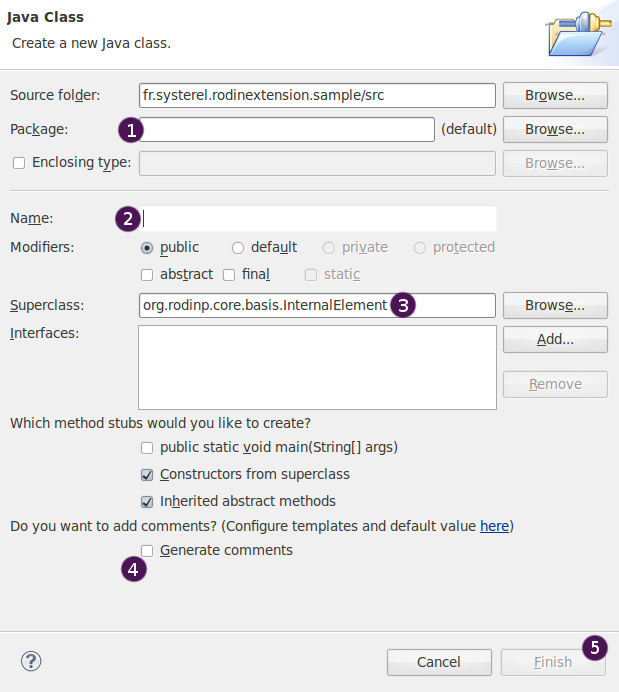
The following wizard appears :
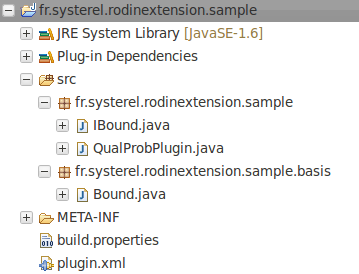
1. First specify a package where you want this class to be stored. As we want to organise a bit the project, we will say that all elements that we add will be part of a new package called fr.systerel.rodinextension.sample.basis,
2. Give the name of the class : "Bound",
3. We see that the superclass of this element is org.rodinp.core.basis.InternalElement but we know that we will implement an element specific to Event-B, so we put here org.eventb.core.basis.EventBElement,
4. You can optionnaly add comments automatically to the created class, if you set them in "Preferences > Java > Code Style > Code Templates",
5. Click on "Finish" to create the class.
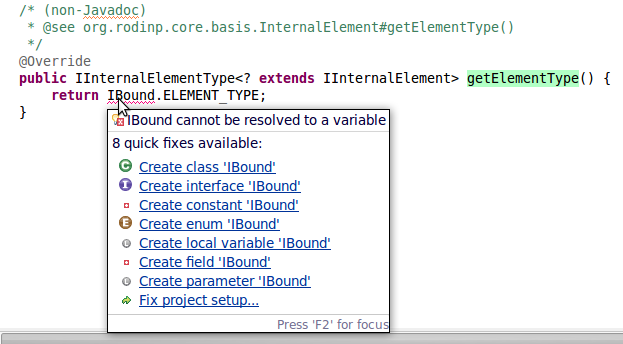
The class Bound.java has now been created. We can open it and review its contents that we shall anyway modify now.
Step 5
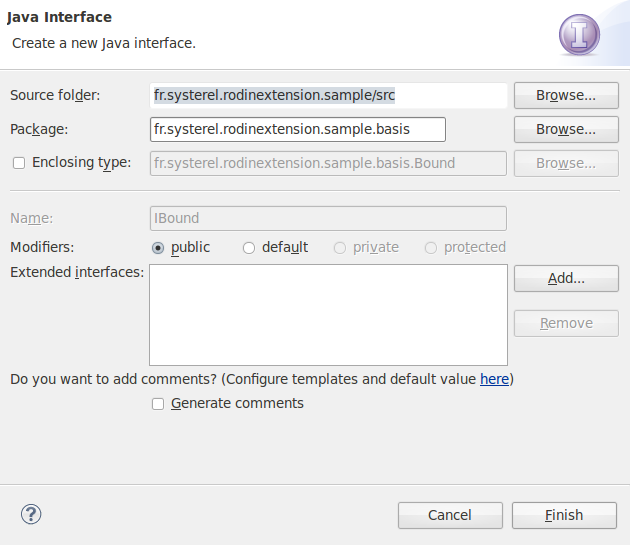
//move Ibound.java
