Statemachine Animation Tutorial
Overview
This tutorial will demonstrate the capabilities and a simple use case scenario of the UML-B Statemachine Animation plug-in that in combination with ProB Animator provides the means of visually verifying a model defined in terms of the UML-B statemachine diagrams.
In this tutorial you will be working with a sample UML-B project that models an ATM. The project consists of several machine refinements and statemachine diagrams, which you will animate using ProB and Statemachine Animation plug-in by following the step-by-step instructions supplemented with the screenshots. After completing the tutorial hopefully you will become familiar with visual statemachine diagram animation and get an idea of its benefits.
Prerequisites
The tutorial assumes you have the following installed:
- Rodin platform v1.1 or later
- ProB Feature plug-in
- UML-B Modelling Environment plug-in
- UML-B Statemachine Animation plug-in
all available from http://www.event-b.org and Rodin Update site.
In addition you will need a sample UML-B project, which is available from here.
Getting started
Prior to working with the ATM UML-B project let's create a new clean environment i.e. a new Rodin workspace
a. Select File -> Switch Workspace -> Other
b. Enter a unique name and path for a new workspace and press OK
After we have a new workspace we need to import the UML-B project to start working with it
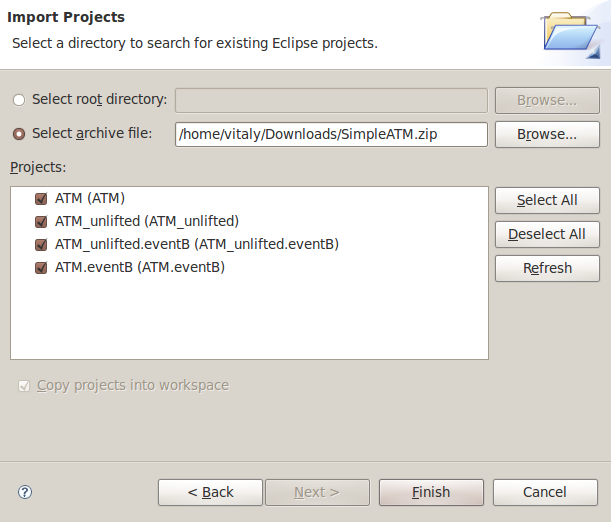
a. Select File -> Import... -> "Existing Projects into Workspace" and click Next
b. Click on the checkbox "Select archive file" and Browse for the downloaded UML-B project archive file (SimpleATM.zip)
c. Make sure that all the projects in the Projects list are checked and click Finish
As you can see at this point there are four projects in total, two of which are UML-B projects that are different implementation versions of the ATM model: normal and class-lifted. The other two projects are standard Event-B projects generated from the UML-B. To show the complete functionality of the Statemachine Animation plug-in we will be using a class-lifted version of the ATM UML-B model, named "ATM". You can open open it and have a look at the contained UML-B diagrams.
Statemachine animation
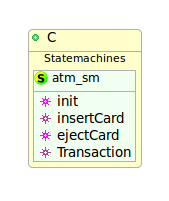
First let's open the abstract UML-B class diagram ATM.ATM_A.classDiag which consists of a single class C that represents a card used by ATM and contains atm_sm statemachine. You can see from here that statemachine is class-lifted - it belongs to a class. This will affect the UML-B to Event-B translation and final Event-B model in a sense that there will be a type C generated for instances of that class.
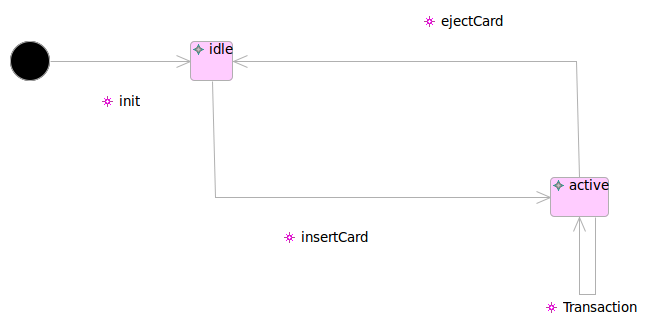
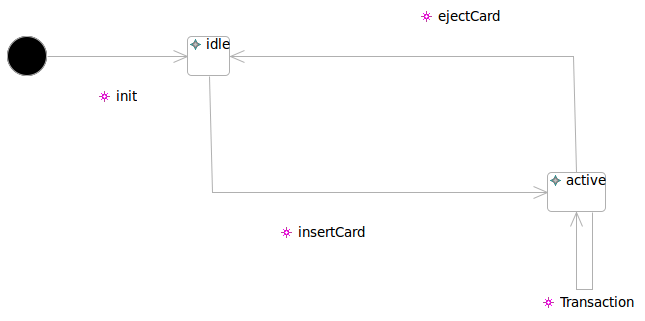
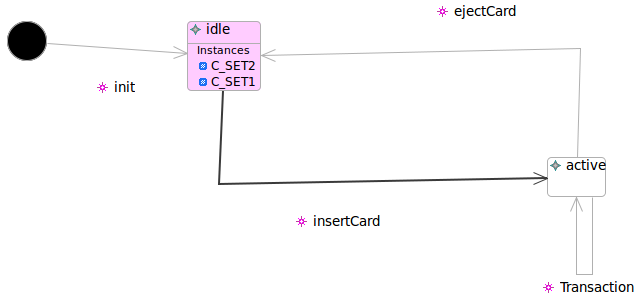
Now let's open atm_sm statemachine diagram before animating it. This can be done either by opening ATM.ATM_A.C.atm_sm.stateDiag diagram file or by double-clicking on the statemachine directly. The statemachine contains three states: initial state, idle and active, and four transitions: init, insertCard, ejectCard and Transaction.
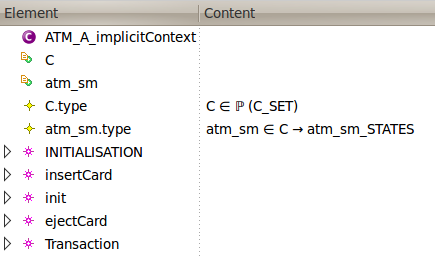
When translated to Event-B the transitions become ATM_A machine's events of the same names. The states are translated differently depending on the translation type and class-lifting property of the container statemachine. In our case the functional translation is specified, which you can see from the properties view of statemachine, so the states are translated into a single function (information about the states is contained in a function variable, see UML-B details). The translated ATM_A EventB machine is available from corresponding ATM.eventB project.
Now to animate the abstract statemachine atm_sm you need to
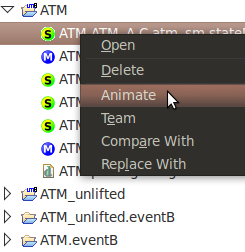
a. Right-click on the diagram file that corresponds to atm_sm statemachine i.e. ATM.ATM_A.C.atm_sm.stateDiag
b. Select Animate
Note: Try multiple-selecting other diagrams, for instance class diagram ATM.ATM_A.classDiag. You will notice that Animate action is not available - it only appears when all the elements in the selection are statemachine diagrams.
After you initialise the animation the tool first switches to ProB perspective and shows its views, reads selected UML-B statemachine diagram files and creates a corresponding animation diagram for each of them. The animation diagrams are then opened and ProB starts to run its animator on the container machine.
As you can see the opened animation diagram looks similar to the original UML-B statemachine diagram. This is not always the case, as animation diagram only contains states and transitions without any additional information from the UML-B. If our statemachine diagram contained a state with invariants inside, those would not appear on the animation diagram as irrelevant to animation. In addition the UML-B and animation diagram layout may differ, especially if a UML-B diagram doesn't have its layout information defined after the diagram has been generated.
Note: In fact the animation plug-in is implemented on a different model, which is a small subset of the UML-B model. When an animation diagram is opened a specific animation resource is created for it on the workspace in the same project folder as animated statemachines. These resources are only used during the animation process, but remain there until removed either manually or using a "Clean all animation output resources" button.
Tip: If you are not satisfied with the automatic layout of the animation diagram it is possible to change it manually: the diagram elements can be moved with a mouse, as well as transitions can be bended. Deletion of the elements however is forbidden.
As it was mentioned before, the animation tool works in combination with ProB animator. It actually starts ProB animator and uses it's output to update the animation diagrams, but on the other hand it also drives the animator when actions are made on the diagram elements. In other words it works as an interface between the UML-B and ProB, delivering the existing functionality of ProB to UML-B. In this context the statemachine animation is only an aid to ProB animation, which will become more obvious in the next step.
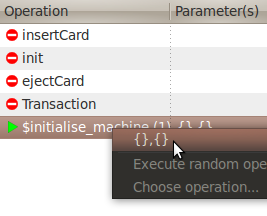
When the animation has started, from ProB's Operations view it can be seen that the only available operation is "$initialise_machine" - the ProB is awaiting to initialise all the machine's variables and constants with initial values. This is one of the cases where statemachine animation flow is strictly limited to using the ProB. To continue the animation
a. Right-click on the "$initialise_machine" operation in the Operations view
b. From the operation's parameter context menu select the desired set of initial values to initialise the machine (in our case the ATM_A machine has no constants, so only a single option is available)
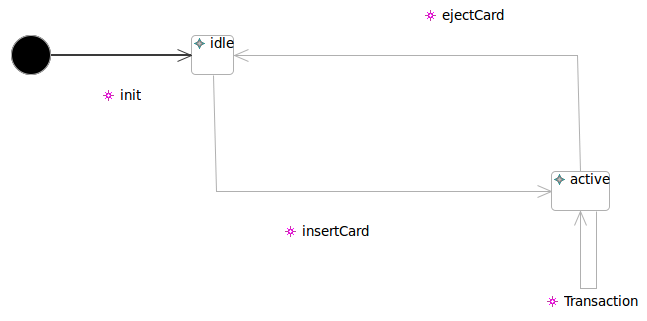
Straight after the machine is initialised we should notice some changes on the animation diagram: the init transition has become bold, which means it was enabled. As the init transition has a corresponding EventB event in the ATM_A machine, the Operations view will also show that this event is now enabled. Now at this point the class-lifting property comes into scene as init event creates instances of the class C.
Now let's create an instance of class C, i.e. a card to use in our ATM. This can be done using the Operations view of ProB as in the previous step, but a better option is to start using the statemachine animation capabilities to do the same thing. Thus to create an instance
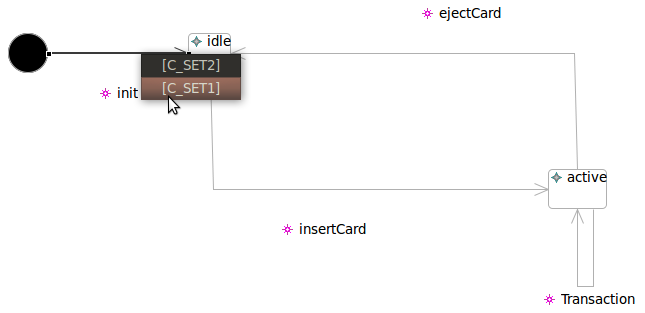
a. Move the mouse over "init" transition or its label and left-click on it. You will see the pop-up menu containing the list of available parameters.
b. From the menu select "C_SET1"
Note: When you click on a transition the tool actually calls a corresponding ProB operation, which is also available from Operations view. If the operation has parameters, a selection pop-up menu appears to let you choose one of them, as you have seen in the previous step, otherwise the operation is called automatically.
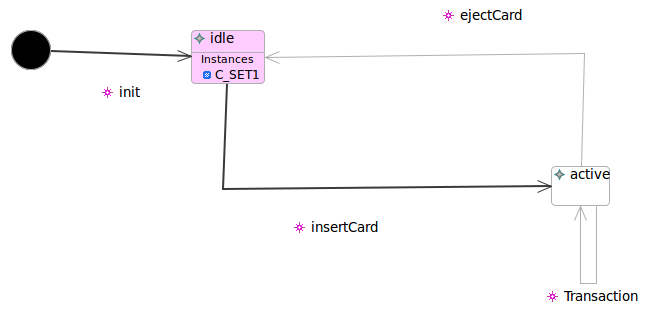
After we have created an instance C_SET1 of class C it appears on the diagram as a token inside the "idle" state. The state itself has also changed its appearance and now is highlighted. This means that instance C_SET1 is in the "idle" state now and this state is active i.e. it contains one or more instances. A single instance can only be in one state at a time, however many instances can be in a single state. Another change you should notice is that "insertCard" transition becomes enabled. If you are curious enough to click on it you can see from the parameter selection menu that this transition is enabled for the newly created instance C_SET1. It doesn't mean however that any outgoing transition from active state is automatically enabled for any instance in that state - it is the EventB model implementation that specifies the behaviour of a corresponding event.
To have some option let's create another card (instance of C) in the same way we did it previously
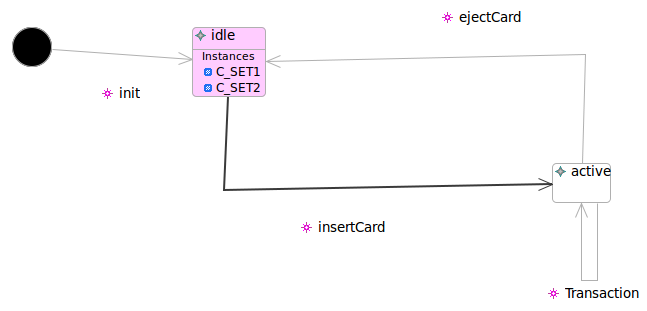
a. Left-click on the "init" transition. You should see the pop-up menu again, but this time it doesn't have the C_SET1 anymore.
b. Select C_SET2 to create an instance of this name
So we should have two cards now: C_SET1 and C_SET2, both in the "idle" state of ATM. To test them let's use one of the cards on ATM
a. Left-click on the "insertCard" transition to insert a card into ATM
b. From the pop-up menu select card C_SET1
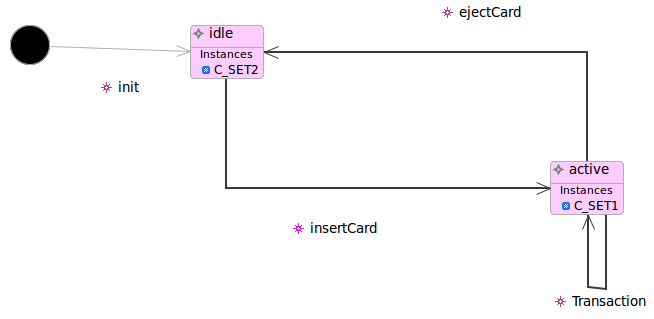
After the card C_SET1 is inserted you can see that instance token C_SET1 has moved to the "active" state. The "Transaction" and "ejectCard" transitions become enabled for this instance as well. To model a standard card use case let's make a transaction with card C_SET1
a. Left-click on the "Transaction" transition
b. From the pop-up menu select C_SET1
Note: As we have inserted only one card yet, the transaction is available for this card only, which you can see from the pop-up menu - it contains a single option C_SET1. Despite of a single option the pop-up menu still appears and waits for user to select a parameter. This lets you see what parameters does a transition take: you don't have to select an option after you have clicked on a transition and caused a menu to appear. As it was mentioned above, the only case when menu doesn't appear and linked ProB operation is called automatically is when it has no parameters at all.
When we have done a transaction on card C_SET1 it seems that nothing happens. Don't forget that this is an abstract model of ATM, so a transaction models all the underlying actions. You can see from the History view of ProB that Transaction event has been called on card C_SET1. The model allows to do many transactions in succession on a single card, so after we have done a transaction it is enabled again on card C_SET1, thus all the transitions and both instances preserve the same state.
After the transaction is done let's eject the card we operated with. This is modelled by the "ejectCard" transition
a. Left-click on the "ejectCard" transition
b. Select C_SET1 from the pop-up menu
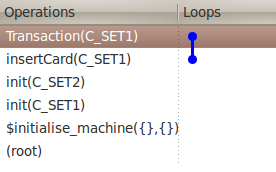
You can see now that card C_SET1 has been ejected and instance token C_SET1 has moved back to the "idle" state. The diagram looks similar to the one when both cards were just created, however if you check the History view of ProB you will see the record of all the operation we have made so far: we have created two instances of class C that modelled ATM cards, inserted one of the cards into an ATM, made a transaction on it and ejected the card.
Tip: ProB not only allows you to see the history of called operations, but also to go back in time: to double-click on an specific operation in history and go to that state. The animation tool supports this feature and updates the diagram accordingly, so if for instance you double-click on the Transaction(C_SET1) in History view, you will go back to a state when we have made a transaction on card C_SET1.
Conclusion
In this tutorial we have followed a short use case scenario of animating a statemachine diagram of a simple UML-B model. In addition to the features showed in the tutorial the animation plug-in supports multiple statemachine diagram animation, for which you need to select several diagram files before calling the animation. Each diagram will be opened in a separate editor, allowing you to layout them at your preference. The animated statemachines are also not restricted to a single refinement of a machine - you can select the diagrams from different refinement levels and call the animation on them.
